
< 3D World
> Intro
> Overview
• Create
> Bryce
— 3D World: Anaglyphs, Create —
Monochrome
Anaglyphs can be made from colour pictures. If there are strong red or green parts and glossy reflections in the pictures, both eyes see some of the parts of both pictures and this disturbs the 3D effect. Therefore, it is preferable to work with monochrome (black and white) pictures.
Colour -> Monochrome -> Colour Conversion
Open both pictures with a graphics or image processing program and select as
color mode «monchrome», «greyscales» or whatever this
option is called in the program used. When the pictures are colourless and grey,
change the mode back to true color (24 bit). The pictures are still displayed in
grey, of course, because they have lost all colours. This is exactly, what we
want.
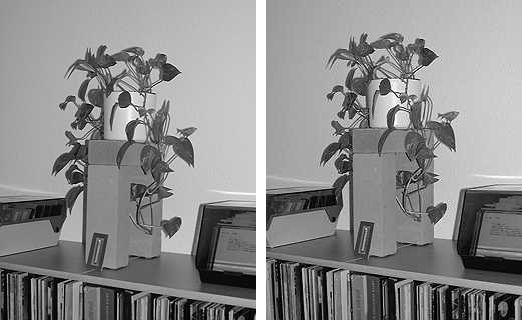
The almost identical, colourless pictures from which we will now create an anaglyph.
One-coloured monochrome
The title is a pleonasm, of course, since monochrome means one (mono) colour (chroma) already. What is meant here is that the pictures must now be converted into different coloured monochrome pictures.
Red / Cyan
This is not the only colour combination but the one most often used. Cyan is 100% green and 100% blue and together with 100% red the full image brightness is retained.
The left picture becomes a redscale one from black to red instead of black to white. With the color correction option of the graphics program you remove all parts of green and blue from the picture.
Do the same with the right picture but extract all red parts that are in it. What you get is a cyanscale picture from black to cyan.
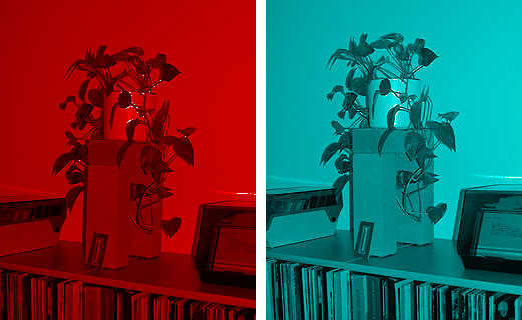
Left the red-monochrome and right the cyan-monochrome picture.
Assembling
Superimposing
Generally the left, red picture is opened in a graphics program and the
right, cyan one inserted as an object over the red one – which
disapears in the process. The cyan object has to be made 50% transparent
using the properties option. What you get is a dark picture with low
contrast and you can save it as the raw anaglyph. Of course, you can
inverse the process by starting with the cyan picture and overlay the
red one as the object.
Position of the pictures
This works smoothly enough for pictures comming from a raytracing program.
However, when using pictures shot with a camera, the object has to be
correctly aligned over the base picture. The hight must be correct, which
is rather straightforward. The horizontal position cannot so obviously be
determined. According on how it is positioned, a different impression is
optained.
If an item in the foreground is aligned, the depth receeds from the viewer, i.e. near things appear on the screen and far ones disappear into the screen. If a far item is aligned, the inverse happens: the far parts appear on the surface of the screen and near things protrude from the screen and approach the viewer. Such anaglyphs are more difficult to see. If an object in the middleground is aligned, it will appear glued on the screens surface, far objects crawl into the screen and near ones are perceived to hang in the thin air between the screen and the viewer.
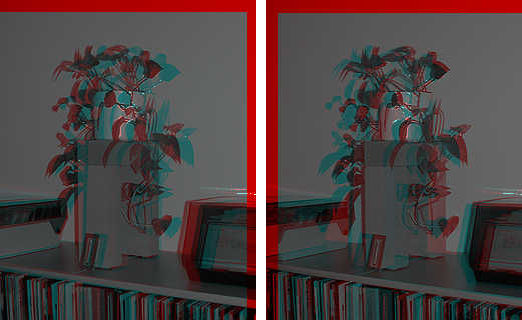
Superimposed pictures. At left, the plant appears to be coming out of the screen while at right, the plant is perceived as being within the screen. How the cyan picture is superimposed over the red one can be deduced from the red frames.
Finishing the job
Cutting out and correction of brightness
Pictures from raytracing programs can be superimposed 1 : 1 and there is no
frame that has to be cut off.
When the usable part of the pictures from CCD-cameras has been selected and put into a new picture, brightness and contrast can be adjusted here as well. The histogram in the graphics program shows that the newly created picture only uses half of the brightness range. Adjust the brightness jointly for all colour channels (red, green and blue) to conclude the creation of the anaglyph.
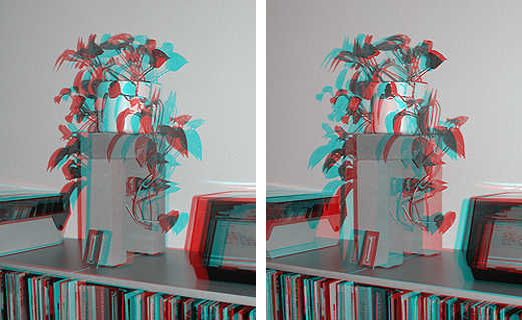
Finished anaglyphs from the same pictures. Using red-cyan goggles, you will note that the pictures produce different 3D impressions. Now you know why the version at left is more difficult to see.
Examples
Colour and Monochrome
The example shows the same anaglyph, which I created from a Bryce
scene (see Gallery). It is here to show the difference between
coloured and monochrome anaglyphs.
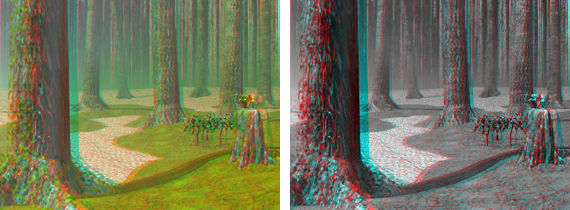
The left, coloured anaglyph looks nicer, the 3D-effect is less obvious compared with the one at right, however.
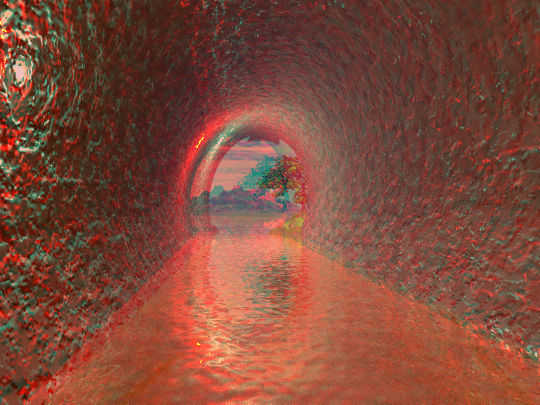
Annoying reflexion
This shows how annoying reflextions can become. The small bright yellow
line at the left side near the exit of the tunnel appears on the surface
of the screen and thus spoils the anaglyph completely.
I wish happy experimenting with anaglyphs. In the Gallery you will find some of my attempts and most of the time there is also a note on how much I had moved the camera for the shots.
A word on Raytracing
Making an anaglyph of your world created immediately shows where you had
cheated and what objects have been misplaced.
© 2004 - 2018 by Horo Wernli.